Learning how to import Excel data into R and RStudio is essential for any data analyst working with spreadsheet files. This complete guide shows you how to import Excel files into RStudio using both the graphical interface and the readxl package with code-based methods.
Whether you need to import Excel into R for data analysis, load Excel data into R for statistical modeling, or import Excel file in RStudio for quick analysis, this tutorial covers everything. We'll handle both .xls and .xlsx file formats using the powerful read_excel() function.
In six easy-to-follow steps, you'll master RStudio import Excel workflows and learn how to import Excel to R efficiently for any data analysis project.
Prerequisites
Before you start, make sure you have R and RStudio installed on your computer. If you haven't installed them yet, follow our step-by-step guide on how to install R and RStudio on Windows, macOS, Linux, and UNIX.
Once done, open up R Studio, and we can begin.
Working with CSV files instead? See our guide on importing CSV files in R.
Import an Excel File Into R Using GUI
The easiest way to import an Excel file into R is via RStudio Graphical User Interface. Here are the steps you need to follow:
Step 1: Open R Studio
First, launch R Studio on your computer.
Step 2: Click on 'Import Dataset'
Go to the Environment pane in R Studio, typically on the upper right-hand side. You will see an Import Dataset dropdown menu – as shown in the image below. Click on it.
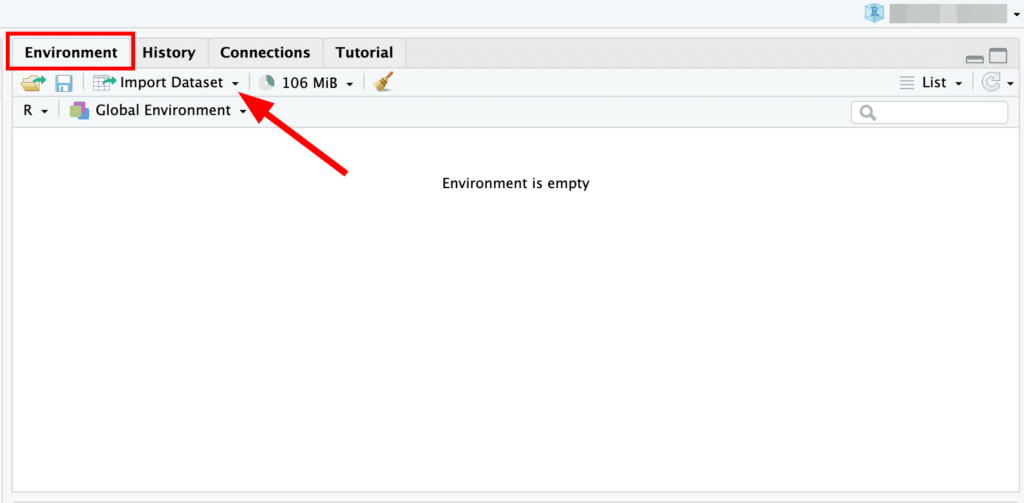 Figure 1: RStudio Environment pane with Import Dataset dropdown menu highlighted.
Step 3: Choose 'From Excel...'
In the dropdown menu, select the From Excel... option. This will open a file explorer.
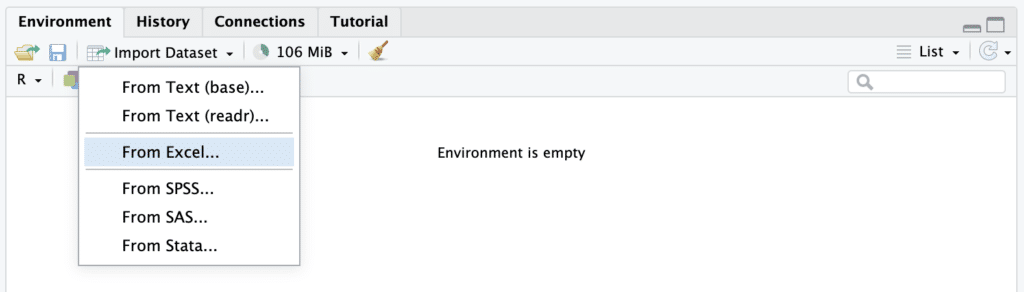 Figure 2: Selecting "From Excel..." option from the Import Dataset dropdown menu in RStudio.
Step 4: Select Your File
On the Import Excel Data window, click the Browse button to navigate to your Excel file in the file explorer, select it, and click Open.
Step 5: Configure the Import Options
R Studio will show you a data import window where you can customize how R Studio reads your Excel file. You can set options such as:
-
Which sheets to import
-
Whether the first row contains the column names
-
Whether to convert text to factors
-
The maximum number of rows to read in, among others.
Step 6: Click on 'Import'
Once you've adjusted the settings to your satisfaction, click on the Import button.
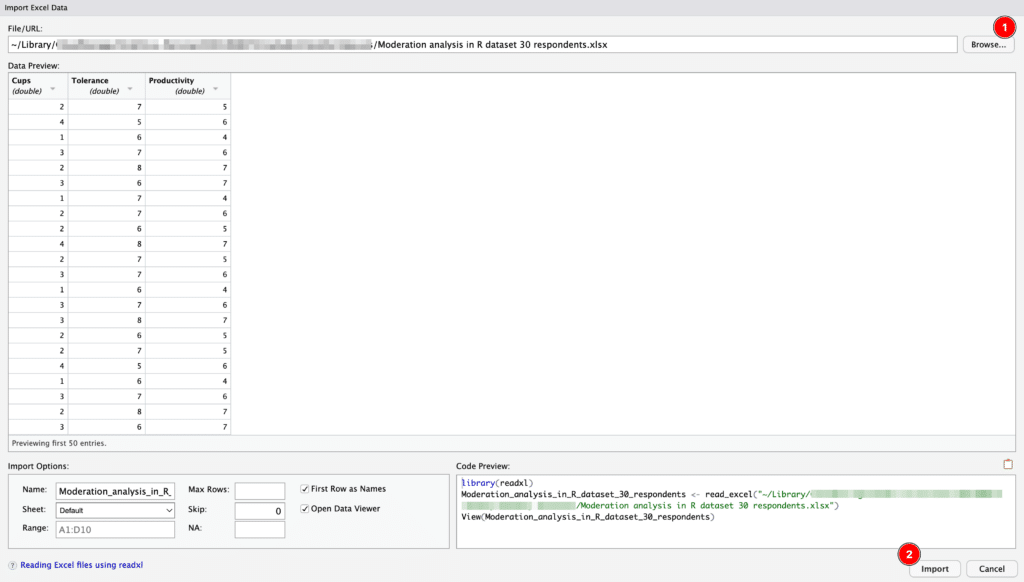 Figure 3: Import Excel Data window in RStudio showing data preview and import options.
Your data will be imported into R Studio and will appear as a data frame in your environment. You can now work with your Excel data in R.
This GUI approach is a great way for beginners to start working with data in R Studio. However, as you become more advanced, you might find the code-based approach more flexible and powerful, particularly for reproducibility and automation of your data analysis workflows.
Import an Excel File Into R Using Code
As you become more advanced in R, you will likely prefer to import Excel files in R via code. Lets learn how to do that next.
Step 1: Install Necessary Packages
Several packages in R can import Excel files, but for this tutorial, we will use the readxl and writexl packages. These packages can handle both .xls and .xlsx formats.
install.packages("readxl")
install.packages("writexl")
The install.packages() function downloads and installs the package from CRAN (the Comprehensive R Archive Network).
Step 2: Load the Required Package
After installing, we must load the readxl package into our R environment. We can do this using the library() function:
library(readxl)Step 3: Set Your Working Directory
In R, it's important to set the working directory to the location where your Excel file is located. This can be done with the setwd() function.
setwd("/path/to/your/directory")Replace "/path/to/your/directory" with the actual path to your directory.
Step 4: Import the Excel File
Now, we are ready to import our Excel file. We'll use the read_excel() function for this. Let's say our file is named data.xlsx.
data <- read_excel("data.xlsx")In this code, data.xlsx is the name of the Excel file we're importing, and data is the name of the R data frame where we're storing the contents of the Excel file.
Step 5: Verify the Data
To make sure your data was imported correctly, you can view the first few rows with the head() function or the entire dataset with the View() function:
head(data)
View(data)
Step 6: Saving the Data
If you want to write the data back to Excel, use the write_xlsx() function from the writexl library.
library(writexl)
write_xlsx(data, "data_modified.xlsx")
This will save your data frame 'data' to an Excel file named data_modified.xlsx.
That's it! You have now learned how to import an Excel file into R using R Studio, manipulate it, and save it back to an Excel file. Remember that working effectively with R comes with practice.
Frequently Asked Questions
Wrapping Up
In this comprehensive guide, you've learned how to import Excel files into R using both RStudio's graphical interface and code-based methods with the readxl package. Whether you're working with .xls or .xlsx formats, these techniques will help you load Excel data into R efficiently for your data analysis projects.
The read_excel() function is your go-to tool for importing Excel data into R, offering flexibility to select specific sheets, handle column names, and manage missing values. As you become more comfortable with R programming, the code-based approach will give you greater control and reproducibility in your workflow.
Need help with other data formats? Check out our guide on importing CSV files in R or learn more about installing R and RStudio on your system.
References
- Wickham, H., & Bryan, J. (2023). readxl: Read Excel files. R package version 1.4.3.
- R Core Team. (2024). R: A language and environment for statistical computing. R Foundation for Statistical Computing.